The Photography Tools Every Beginner Should Have
Published: 08/10/2025
Thinking about starting photography, but not sure what gear you really need? You’re in the right place.
When I first picked up a camera, I was excited and a little lost. Walk into a camera shop or scroll through an online store, and suddenly you’re hit with rows of shiny gadgets: cameras, lenses, bags, tripods, and lights. It feels like you need a small fortune just to begin.
But here’s what I learned: you don’t need it all. The photography tools every beginner should have are simple, affordable, and enough to get started, grow your skills, and enjoy photography without emptying your wallet.
In this guide, I’ll share the gear that actually helps beginners, why it matters, and some handy tips if you’re running your own blog and want to keep things SEO-friendly too.
So, let’s start!
Why These Tools Matter for Beginners
Photography is not about buying the most expensive gear. It’s about learning how to take good pictures. The right tools make this easier. Here’s why:
- They help you practice. Simple gear lets you work on basics like framing your photo, using light, and adjusting brightness.
- They stop common problems. No one likes a dead battery in the middle of a shoot or blurry photos because the camera shakes. Good tools save you from these issues.
- They get you ready for the future. Once you know the basics, you’ll understand what advanced gear you really need later.
Even as a beginner, having the right setup can spark creativity on days when inspiration feels quiet. The tools you choose don’t just support your camera work; they help you feel confident, experiment more, and enjoy photography as a creative journey.
That’s why the photography tools every beginner should have focus on being simple, reliable, and affordable. Next, we’ll look at the essential gear that makes this possible.
Basic Camera Gear You Really Need
To start photography, you don’t need a big setup. Just a few simple tools can help you take good photos, learn faster, and enjoy the process without stress.
1. A Camera (The Brain)
Your camera is the main tool in your kit. For beginners, an entry-level DSLR or mirrorless camera is a smart choice because it gives you manual settings and the option to change lenses as you grow. Brands like Canon, Nikon, and Sony have solid beginner models that are easy to use.
On a tight budget? Don’t worry, many smartphones today can take great photos too. What really matters is learning how to use the camera you have, not how many megapixels it shows on the box.
2. The Kit Lens (Your First Lens)
Most beginner cameras come with an 18–55mm kit lens. This little lens may look simple, but it’s very flexible. You can shoot wide landscapes, close portraits, and everyday scenes with it. More importantly, it helps you understand how zoom, focus, and framing work before you think about buying expensive lenses.
3. An Extra Battery (Your Backup Power)
Running out of battery in the middle of a photo walk can be frustrating. That’s why carrying a spare battery is a must. They’re affordable and can save the day during long trips, outdoor shoots, or cold weather (which drains batteries faster). Think of it as a low-cost insurance policy for your camera.
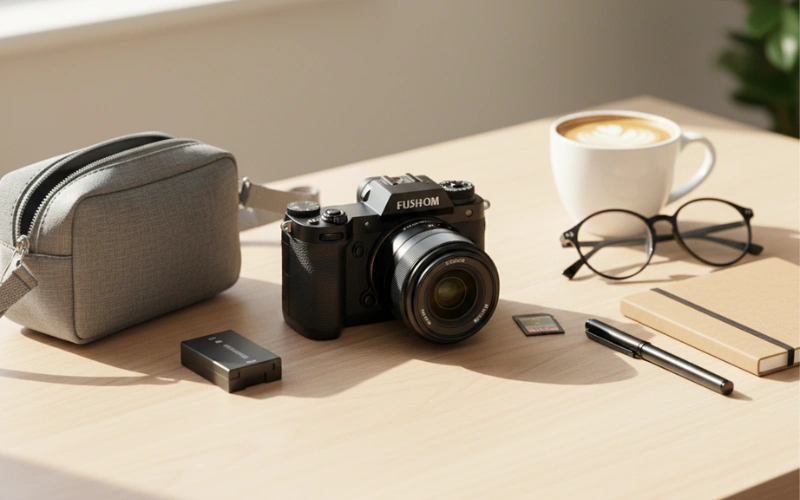
4. A Reliable Memory Card (Your Photo Storage)
Photos take up space quickly, so a good memory card is key. Look for trusted brands and check for labels like UHS-I or UHS-II, which mean faster saving and loading speeds.
Pro tip: Instead of using one big card, keep two medium-sized ones. That way, if one card stops working, you don’t lose all your photos at once.
Must-Have Accessories for Better Shots
Once you have your camera and lens, a few extra tools can make your photos sharper, steadier, and more creative. These must-have accessories take your shots to the next level without being hard to use.
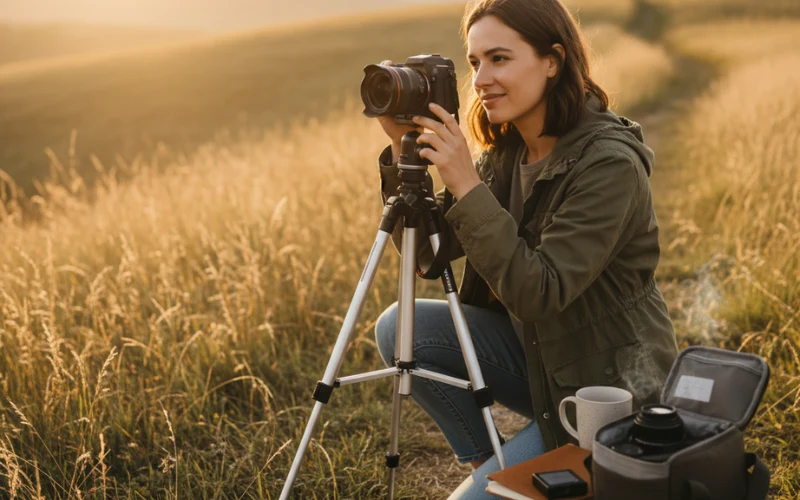
5. A Tripod (Your Steady Helper)
A tripod is like an extra pair of hands. It keeps your camera still, which is super helpful when:
- You’re shooting at night and need longer exposure.
- You want smooth shots of waterfalls, moving cars, or city lights.
- You’re taking a group photo or a self-portrait without blur.
For beginners, a lightweight and budget-friendly tripod is best. Pick one that folds small so you can carry it on trips without hassle.
6. A Prime Lens (The Beginner’s Upgrade)
The 50mm f/1.8, often called the “nifty fifty,” is one of the best lenses for beginners. Why?
- It’s affordable
- It’s sharp and works great for portraits, food, or travel photos.
- It performs well in low light, so you don’t always need flash.
This lens also lets you try the shallow depth of field effect, the blurry background you often see in pro photos. It’s an easy way to make your pictures look more creative and professional.
7. Camera Bag (Your Safe Organizer)
Once you start collecting gear, you’ll need a safe place to keep it. A padded camera bag protects your camera and lenses from bumps, scratches, or even bad weather.
Look for a bag with:
- Adjustable compartments so everything fits neatly.
- Weather-resistant material for outdoor shoots.
- Comfortable straps if you plan to carry it while traveling.
A good bag saves you stress and keeps your tools ready whenever inspiration strikes.
Simple Editing and Storage Tools for Beginners
Taking photos is just the first step. To make them look their best, you’ll also need a few tools for editing and storing your work. These post-production tools help you protect your photos and improve them with simple edits.
8. External Hard Drive (Your Photo Backup)
Your photos are memories you don’t want to lose. That’s why an external hard drive is a must. Follow the “two-copy rule”: keep one copy on your memory card and another on your hard drive.
This way, if something goes wrong, like a lost card or computer crash, you still have a safe backup. Even a small, affordable hard drive can save you from a lot of stress.
9. Editing Software (Your Digital Darkroom)
Editing your photos is part of learning photography. It is not cheating. Beginners can start with free tools like Snapseed, Lightroom Mobile, or GIMP, or choose paid options like Adobe Lightroom for more control.
Even simple edits like cropping, adjusting brightness, and correcting colors can make your photos look much better. Think of editing as putting the finishing touches on your artwork. It helps your pictures really stand out.
 Subscribe to my YouTube channel
Budget-Friendly Cleaning & Maintenance
Keeping your camera and lenses clean is easy and important. With a few affordable tools, you can protect your gear, avoid damage, and make sure your photos always look their best.
10. Lens Cloths or Lens Pen (Keep Your Lens Clear)
Even a small fingerprint or dust spot can make your photos look blurry. A simple microfiber cloth or lens pen is all you need to keep your lens clean. They are cheap, easy to carry, and help your photos stay sharp and clear every time you shoot.
11. Air Blower (Safe Dust Removal)
Dust can sneak into your camera or lens, affecting your pictures. An air blower is the safest way to remove it. It is better than canned air, gentle on your gear, and very affordable. Carry one on trips or outdoor shoots to keep your camera clean and working well.
FAQs
A camera and a basic lens. These two are the foundation of your kit. Everything else, like tripods or extra batteries, can come later.
Not at all. Good technique, practice, and understanding your camera are far more important than expensive equipment.
Start with your kit lens. When you feel ready, add a prime lens like a 50mm f/1.8 to improve portraits and low-light shots.
Yes! Many smartphones today have excellent cameras. They are perfect for learning composition, lighting, and editing before buying a bigger camera.
It’s not mandatory, but very helpful. A tripod keeps your camera steady for night shots, long exposures, or group photos.
Use an external hard drive as a backup and keep a copy on your memory card. This “two-copy rule” prevents losing photos if something goes wrong.
Yes, but it doesn’t have to be complicated. Free tools like Snapseed, Lightroom Mobile, or GIMP are enough to start with basic edits like cropping, brightness, and color corrections.
Clean your lens before each shoot and use an air blower for dust on your camera sensor. Simple tools like a microfiber cloth or lens pen help keep your photos sharp.
No. Start with the basics (camera, kit lens, memory card, battery). Gradually add accessories like a tripod, prime lens, or bag as you learn and practice.
Practice regularly, try different lighting and angles, experiment with simple edits, and review your photos. Learning techniques and building confidence are more important than having the latest gear.
Final Thoughts
The photography tools every beginner should have are not for showing off. They are for learning smart and enjoying the process. With a good camera, a kit lens, a prime lens when you’re ready, a tripod, and a few simple accessories, you can take amazing photos without carrying a heavy or expensive setup.
My personal advice: practice as much as you can, experiment with different angles and lighting, and don’t rush to buy new gear. Upgrade only when you really need it. Remember, the most important part of photography is not the equipment. It’s the eye and creativity behind the camera.
Now it’s your turn: grab your camera, start shooting, and see how much you can create with just the basics!

- Be Respectful
- Stay Relevant
- Stay Positive
- True Feedback
- Encourage Discussion
- Avoid Spamming
- No Fake News
- Don't Copy-Paste
- No Personal Attacks
- Be Respectful
- Stay Relevant
- Stay Positive
- True Feedback
- Encourage Discussion
- Avoid Spamming
- No Fake News
- Don't Copy-Paste
- No Personal Attacks
