Night Photography for Travelers – Tips for DSLR & Mobile Shots
Published: 06/11/2025
I’ve always found night photography to be a truly special experience. It’s quiet, calm, and somehow feels more honest than shooting during the day. When the streets go still, and the lights begin to glow, the world shows a softer side. In Lahore, I’ve walked around the Walled City watching the golden lights shine on old Mughal walls. In Karachi, the sea breeze carries the glow of roadside stalls at Clifton Beach. And up in Hunza, the sky turns into a blanket of stars so bright it hardly feels real.
For me, night photography has never been about the gear I carry. It’s about noticing light where others see darkness — that small moment when a street lamp, a reflection, or even a spark from a tea stall fire turns into a story worth capturing.
In this article, I’m going to talk about night photography for travelers in detail — the techniques, camera settings, and simple tips that make those late-night shots come alive. Whether you’re using a phone or a DSLR, I’ll share everything I’ve learned on the road to help you shoot better under the stars.
So, let’s start.
Why Night Photography Feels Different
Most travelers focus on sunrise or golden hour shots, but night travel photography opens up a whole new way to see the world. I’ve learned this through years of shooting on the road. Once the sun goes down, light behaves differently, and every scene tells its own quiet story.
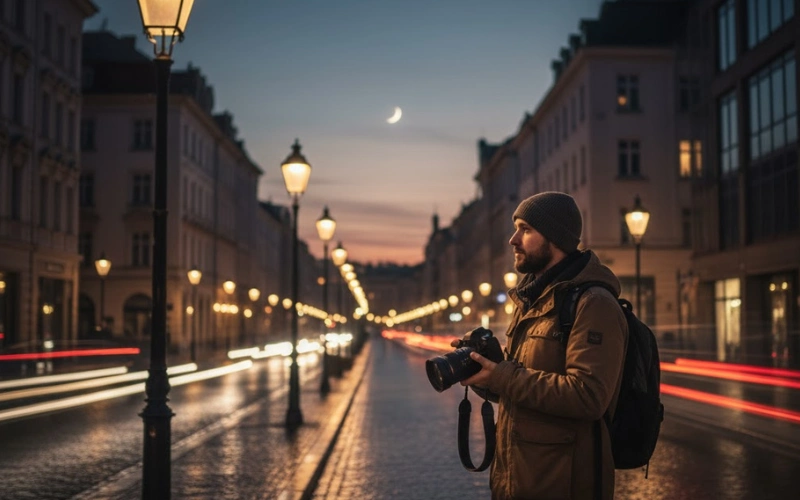
Cities change completely after dark. Streetlights, glowing windows, and moving headlights turn simple streets into dramatic frames. Even the same corner you walked past in daylight looks more interesting once the lights come on.
Nature also reveals a softer side at night. The stars, moonlight on water, or mountain outlines under a dim sky can add a mood you’ll never get during the day. These are the moments that make night photography so rewarding.
There’s also more space and calm. You don’t have to worry about tourists or busy crowds getting in the shot. You can slow down, experiment, and really learn how light works.
Night photography takes patience, yes, but when you finally catch that perfect exposure or reflection, it feels worth every second of waiting.
Shooting Night Photos with a DSLR
If you travel with a DSLR, you already have the best tool for creative night shots. It gives you full control over light, focus, and detail, which makes all the difference when shooting in the dark. Here’s what I’ve learned from years of practice: These low-light photography tips help both beginners and pros get clean results.

Switch to Manual Mode
Auto mode often gets confused in low light. Manual mode lets you control every setting. Start with ISO between 800 and 1600, open your aperture wide (around f/2.8 or lower), and slow your shutter speed to 1–10 seconds depending on the lighting. The darker it gets, the slower you can go.
Always Carry a Tripod
Even a small travel tripod can completely change your results. Night shots usually need slow shutter speeds, and it’s almost impossible to hold your camera steady by hand. oktripod keeps your images sharp, especially when shooting stars, city lights, or reflections.
Try Long Exposures
This is where the magic happens. Long exposure means keeping the shutter open for several seconds, which captures light trails and movement beautifully. For example, I once took a 5-second exposure in Islamabad’s Blue Area, and every car headlight turned into smooth lines of red and white light. Try this technique wherever there’s motion — cars, rivers, or even people walking.
Use Manual Focus
Autofocus often struggles in the dark. Switch to manual focus and use live view to zoom in on a distant light source until it looks sharp. Once you get used to this, it becomes second nature.
Shoot in RAW Format
Always shoot in RAW instead of JPEG. RAW files hold more detail, which helps when editing later. You can fix white balance, shadows, and highlights easily without losing quality. It’s a small change that makes a big difference in night photography.
A Quick Note for DSLR Beginners
If you’re new to manual settings, don’t worry about getting everything perfect right away. Think of it as a bit of trial and error. Start by adjusting one setting at a time — maybe play with ISO first, then try different shutter speeds. Review each shot on your camera screen, see how it looks, and tweak from there. With a little patience, you’ll quickly learn how your camera reacts to different light levels.
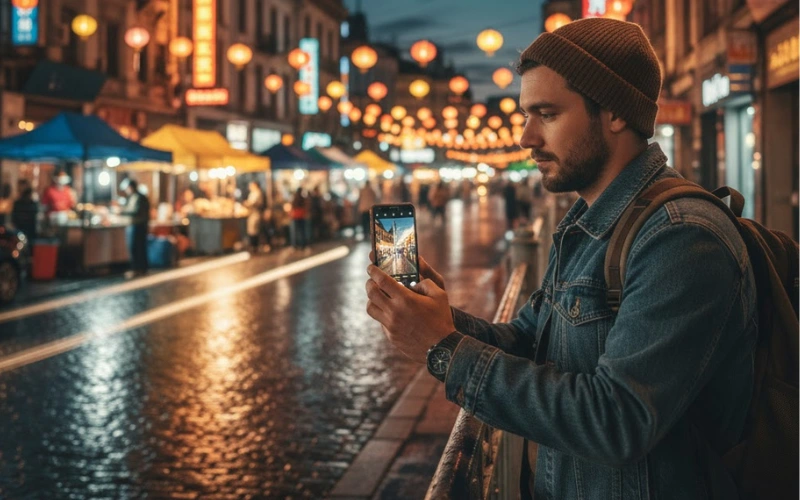
Night Photography with a Mobile Phone
Never underestimate what your phone can do. Modern phones like the latest iPhones, Samsung Galaxy models, and Google Pixel cameras can capture beautiful night shots when used correctly. Over the years, I’ve tested dozens of phones during my travels, and here’s what truly works:
Use the Night Mode Correctly
Night mode is your best friend for low-light photos, but it needs stability. Keep your phone still by resting it on a wall, railing, or even your backpack. The camera takes several frames and blends them together, so any shake will make the image soft or blurry.
Adjust the Exposure Before Shooting
Before you press the shutter, tap on the brightest area of your frame and slide the exposure a little lower. This simple step prevents harsh lights from looking blown out, especially around street lamps or shop signs.
Try the Manual or Pro Mode
If your phone has a Pro or Manual option, use it. It gives you control over ISO, shutter speed, and focus. For most scenes, keep ISO around 400–800 and shutter speed between 1 and 2 seconds. You can experiment based on how dark the place is. This small effort gives your photos more depth and less grain.
Clean the Lens First
This one sounds basic, but it makes a big difference. Phone lenses easily collect fingerprints, especially while traveling. A quick wipe with a soft cloth before shooting can instantly improve sharpness and color.
Avoid Using Digital Zoom
Digital zoom only crops your image, reducing its quality. It’s always better to move closer to the subject or crop the photo later while editing. You’ll get cleaner, sharper results that way.
A Quick Note for Mobile Phone Beginners
If you’re new to phone photography at night, start simple. Use your camera’s Night mode first and focus on keeping the phone still. Once you get confident, explore Pro settings like ISO and shutter speed. The best way to learn is through practice — take a few shots, check what worked, and try again. Every location teaches you something new about light and timing.
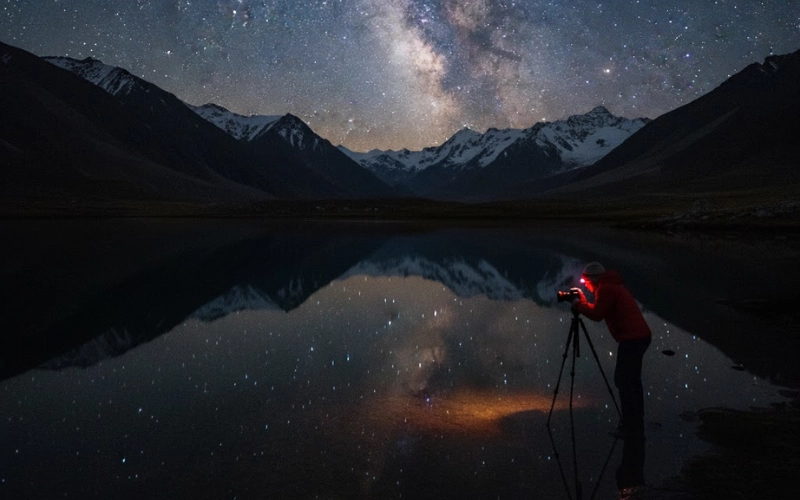
Shooting Stars While Traveling
If you’ve ever been to northern Pakistan, Iceland, or rural Australia, you know how unreal the night sky can look. Capturing stars is easier than you think, with both a DSLR and a modern phone.
For DSLR:
- Use a wide-angle lens (something around 14–24mm).
- Aperture: f/2.8 or wider.
- ISO: 1600–3200.
- Shutter speed: 15–25 seconds.
- Use manual focus and point it at infinity.
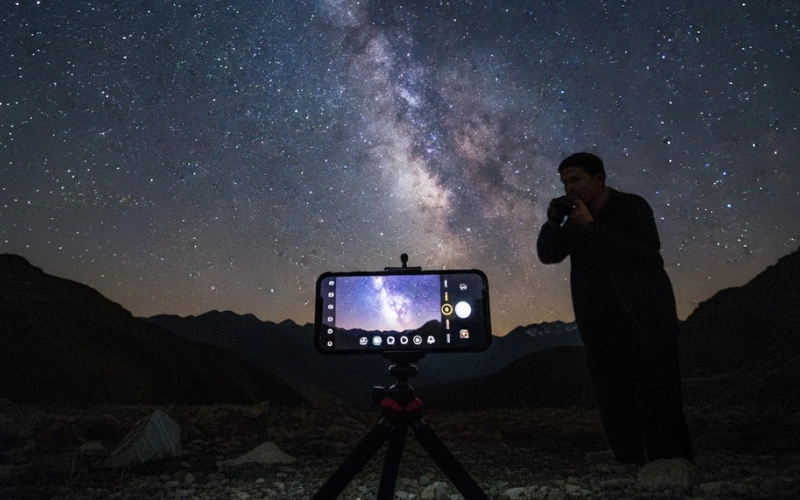
For Mobile:
- Find a dark spot far from street lights.
- Use a tripod or a stable surface to ensure stability.
- Enable Night Mode or Pro Mode and keep the exposure time long (10–20 seconds, if supported).
- Avoid movement or touching the phone while shooting.
Tip: Apps like NightCap Camera (iOS) or ProCam X (Android) give more manual control for star photography.
 Subscribe to my YouTube channel
Capturing City Lights
City lights are where night photography really shines for travelers. Whether it’s Dubai’s skyline, Karachi’s Saddar area, or Japan streets after rain, City lights give you a hundred ways to play with light. Here are a few travel night photography ideas to try next time you’re exploring a new city.
- Look for reflections — puddles, wet streets, windows, or metal surfaces. They double your light play.
- Experiment with light trails — stand near traffic lights or crossings and shoot long exposures to capture the movement.
- Shoot during blue hour (just after sunset) when the sky still has a faint glow. It balances the artificial lights perfectly.
- Include movement — people walking or cars passing — to keep the frame alive.
Common Night Photography Mistakes to Avoid
- Flash? Forget it. It kills the mood and wipes out the natural glow. Use ambient lighting instead.
- High ISO without reason: It adds unnecessary grain. Use a tripod instead of pushing ISO too high.
- Not checking white balance: Night lights have different colors — some orange, some blue. Always adjust it manually or in post.
- Skipping the edit: A little post-processing (such as contrast, clarity, and highlights) can transform a good shot into a great one.
| Pro Travel Tips for Night Shooters |
|---|
|
Final Thoughts
Night photography isn’t about chasing perfect shots. It’s about learning to see the world when most people stop looking. Once the sun goes down, everything changes. You start noticing how city lights paint reflections on wet roads, how a quiet tea stall glows in the dark, and how mountains breathe under a sky full of stars.
Whether you’re using a DSLR on a tripod or just your phone, the magic comes from your eye, not your gear. What matters is the patience to wait for that one right moment — the kind of light that tells a story.
So next time you travel, don’t rush back to your hotel after sunset. Stay out a little longer, let your eyes adjust to the dark, and watch how the world slowly lights up again. That’s where real night photography begins.
Now grab your camera, step outside tonight, and try capturing the light that most people never notice.
FAQs About Night Photography for Travelers
Yes, absolutely. Modern phones, such as the iPhone, Google Pixel, and Samsung Galaxy, feature advanced Night Mode that captures excellent low-light shots. Use a steady surface or a mini tripod, manually lower the exposure, and avoid using digital zoom for the best results.
Use Manual Mode with the following starting points: ISO 800–1600, aperture f/2.8 or lower, and shutter speed between 5 and 20 seconds, depending on the scene. Always shoot in RAW for easier editing later.
Yes. A tripod is one of the most useful tools for night photography, whether you’re using a DSLR or a phone. It prevents motion blur, especially when shooting stars, light trails, or long exposures.
Find a dark spot away from city lights, use a wide-angle lens, and keep your camera still. Set your ISO to between 1600 and 3200, your shutter speed to around 15–25 seconds, and your aperture to wide open (f/2.8 or lower). For mobile phones, use Pro or Night Mode and a tripod.
That happens when ISO is set too high. Keep ISO as low as possible and use longer exposure instead. Grain can also be reduced during editing by adjusting the noise reduction settings.
Use a slow shutter speed (around 5–10 seconds) and mount your camera on a tripod. Let the cars move through the frame during the exposure. Their headlights and taillights will create smooth, colorful trails.
For cityscapes, the blue hour (right after sunset or before sunrise) gives a perfect balance between natural and artificial light. For stars, wait until the sky is completely dark and avoid full moon nights for clearer constellations.
Keep your camera still, using a tripod or a stable surface. Use a timer or remote shutter to avoid shaking when pressing the button. Also, avoid using autofocus; instead, manually focus on a bright light source.
It depends on the place. Always check local safety, avoid isolated areas, and let someone know your location. When possible, go with another traveler or guide.
For Android, try ProCam X or Manual Camera Lite. For iPhone, NightCap Camera and Halide are great. These apps let you control shutter speed, ISO, and focus just like a DSLR.

- Be Respectful
- Stay Relevant
- Stay Positive
- True Feedback
- Encourage Discussion
- Avoid Spamming
- No Fake News
- Don't Copy-Paste
- No Personal Attacks
- Be Respectful
- Stay Relevant
- Stay Positive
- True Feedback
- Encourage Discussion
- Avoid Spamming
- No Fake News
- Don't Copy-Paste
- No Personal Attacks
