How to Capture Sunrise and Sunset While Traveling
Published: 28/09/2025
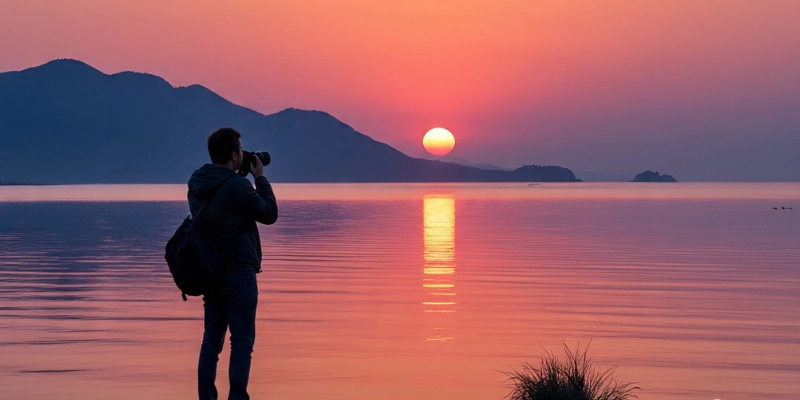
Watching the sunrise and sunset is one of the most peaceful and beautiful moments during travel. Traveling gives us many memories, but nothing feels more magical than witnessing the sunrise or sunset in a new place.
It is one of the most peaceful and beautiful moments during travel. Whether you are standing on a mountain top, sitting by the sea, or walking through a new city, these moments bring a special kind of calm. For travelers, sunrise and sunset photography is not just about pictures; it’s about capturing a memory that will last forever.
In this guide, we will keep everything very simple. You don’t need to be a pro photographer or buy an expensive camera. You don’t need a big camera, even your phone can capture amazing sunrise and sunset shots.
Let’s learn how.
Why Sunrise and Sunset Photography Matters for Travelers
Sunrise and sunset are often called the “golden hours” in photography. Here’s why they are so special for travelers:
- Soft, warm light – The light at these times is gentle, not too harsh. It makes everything look beautiful and natural.
- Unique colors – You get orange, pink, red, and even purple shades in the sky. These colors don’t appear at other times of the day.
- Peaceful moments – Early mornings and evenings usually have fewer crowds. You can enjoy the quiet and capture clean, calm shots.
- Perfect for storytelling – A sunrise photo shows a fresh start to your journey. A sunset photo shows calmness after a long day. Both give meaning to your travel memories.
So, sunrise and sunset photos are not just pictures; they’re emotional memories that tell your travel story.
Step-by-Step Guide to Stunning Sunrise and Sunset Photos
Sunrise and sunset photography may look advanced, but the truth is, it’s all about preparation, timing, and a few simple tricks. Let’s go through each step in detail so even a beginner can capture professional-looking shots while traveling.
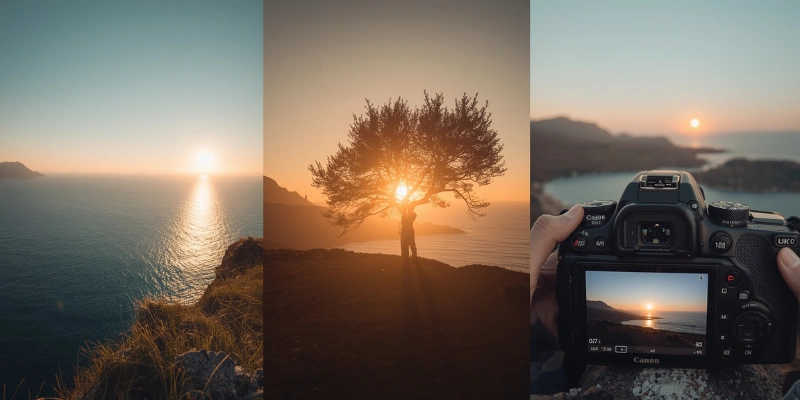
1. Plan Your Spot Ahead of Time
The most important part of sunrise or sunset photography isn’t your camera; it’s where you stand.
- Check the time: Use free apps like Google Maps, PhotoPills, or Sun Surveyor to know the exact time and direction of the sunrise or sunset. These apps show if the sun will come up behind a mountain, over the sea, or above buildings.
- Select a clear spot: Look for areas where you can see the sky without too many tall buildings or trees obstructing the view. If there’s a bridge, pier, or even boats in the frame, it can make your photo look even better. You can also check travel blogs, Instagram, or ask locals for hidden gems.
- Arrive early: For sunrise, arrive 30–45 minutes before the sun rises to catch the soft pre-dawn colors. For sunset, arrive at least 15–20 minutes early, but don’t leave right after the sun disappears; the sky often turns purple, pink, or orange later, which can be the most stunning moment.
- Ask around: A local café owner, guide, or taxi driver might know a perfect spot that’s not on the map.
- Check the weather: Clouds can make your photos more dramatic, so don’t worry unless there’s heavy rain.
- Pack smart: Charge your camera, bring spare batteries and memory cards, and pack a jacket if you’re heading into the cold. Preparing your bag the night before saves stress in the morning.
- Stay flexible: Sometimes the sky isn’t colorful. That’s fine, try the next day again. Nature always surprises.
Traveler’s tip: If you’re at a busy tourist spot, arriving early helps you grab the best place before the crowd arrives.
 Subscribe to my YouTube channel
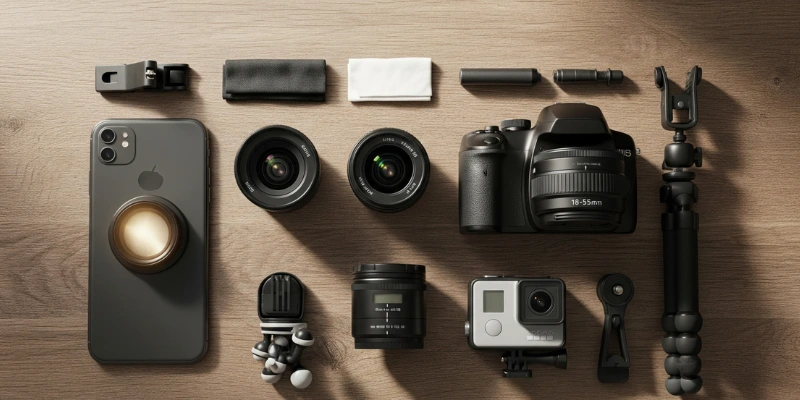
2. Choose the Right Gear (But Keep It Simple)
You don’t need a bag full of expensive gear. Start with what you already have and keep it light.
- Smartphone: Modern phones take amazing shots. Just clean your lens, and if you can, try using a manual mode app for more control.
- DSLR or Mirrorless: Great if you own one, since you can adjust settings. A basic kit lens (18–55mm) works fine. A wide-angle lens (10–15mm) is good for capturing the whole sky, while a zoom lens (70–200mm) is handy if you want mountains or the sun itself to look closer.
- GoPro or Action Camera: Small, easy to carry, and perfect for time-lapse or wide sunset shots. Features like Time Lapse or Scheduled Capture can record the whole sunrise without you pressing a button.
- Tripod: A small travel tripod or even a mini flexible one is super useful to keep your shots sharp. If you don’t want to carry much, clamps or clips (like a GoPro mount) can attach to fences, benches, or rocks.
- Optional extras:
- A remote shutter or timer (to avoid shaky hands).
- A portable power bank (sunset sessions drain batteries fast).
- A microfiber cloth (to wipe dust, saltwater, or fingerprints).
- A simple ND filter (if you want to balance bright skies with darker ground).
Traveler’s tip: Don’t overpack. Carrying too much gear can tire you out and ruin the fun. A phone, a tripod, and one camera (if you own one) are more than enough for amazing sunrise or sunset shots.
3. Check the Weather
The weather is a game-changer in sunrise and sunset photography.
- Clear skies bring golden, bright light, but sometimes the sky looks a bit plain.
- A few clouds are perfect; they reflect colors and make the scene dramatic.
- Too many clouds can block the sun, but that’s a chance for silhouettes or moody shots.
- Fog or haze adds mystery and can make your photos feel dreamlike.
Traveler’s tip: Don’t worry if the weather isn’t perfect. I’ve seen foggy mountain sunrises and stormy beach sunsets that looked more magical than a plain, clear sky.
What I like about photographs is that they capture a moment that’s gone forever, impossible to reproduce.Karl Lagerfeld
4. Use the Right Settings (Easy Mode)
If camera settings scare you, don’t worry. Here’s a simple guide:
On Your Phone:
- Tap on the sun on your screen to focus.
- Slide your finger down slightly to darken the image; it makes colors stand out.
- Try “Pro,” “Sunset,” or “Night” modes if your phone has them.
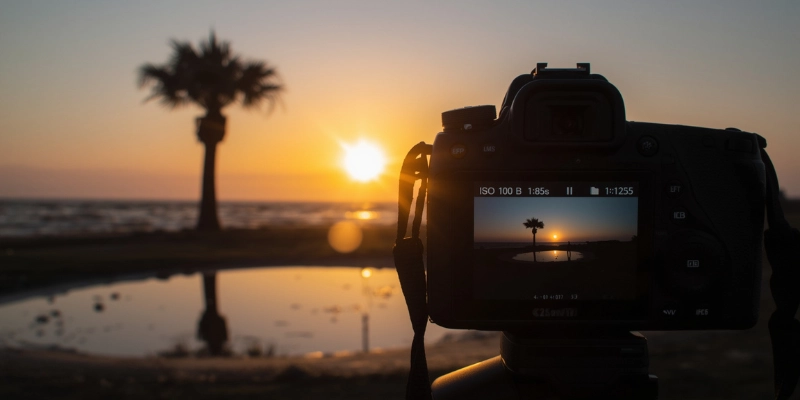
On a Camera:
- ISO: Keep it low (100–200) for sharp, clean shots.
- Aperture: Use f/8 to f/11 for a sharp photo across the frame.
- Shutter Speed: If it’s dark, slow it down, but use a tripod to avoid blur.
- White Balance: Use “Daylight” or “Cloudy” for warmer tones.
- Focus: In low light, use manual focus (pick a tree, building, or horizon). In brighter light, single-point autofocus works fine.
- RAW Mode: If possible, shoot in RAW format so you can edit later with more control.
Traveler’s tip: Don’t feel bad about using Auto mode. Sometimes the best thing is to let the camera do the work while you enjoy the view.
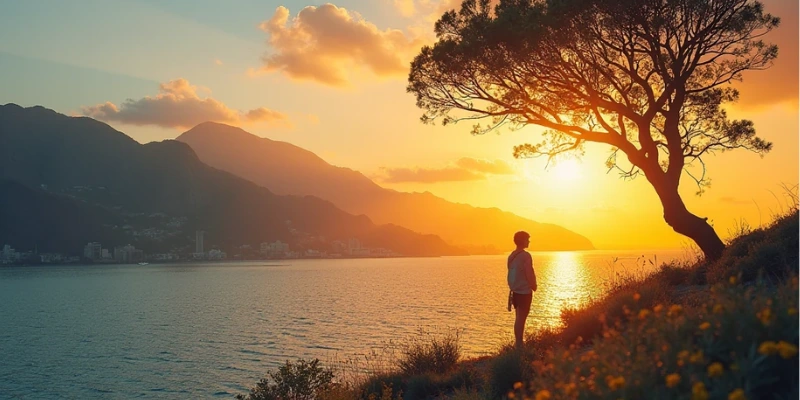
5. Add Something in the Foreground
A photo of just the sun can feel empty. Placing something in the foreground can create layers and make your shot more interesting.
Ideas:
- Palm trees, mountain peaks, rocks, or waves.
- A person, a bicycle, or even your morning coffee cup.
- Reflections in water or puddles for double the effect.
Foreground elements give your picture a sense of place; it becomes your moment, not just another photo of the sun.
6. Try Different Angles
Move around and experiment, you’ll see how much it changes your photo.
- Rule of Thirds: Imagine a tic-tac-toe grid on your screen. Place the horizon or sun off-center for a more natural look.
- Wide shots: Capture the full landscape, mountains, ocean, or city skyline.
- Close-ups: Zoom in on details like light hitting water or sun rays through trees.
- Silhouettes: Place a subject (like a person, tree, or building) in front of the sun for a bold outline.
- Different angles: Shoot straight at the sun for a glowing effect, or at 30–45 degrees for softer, golden light.
Traveler’s tip: Take lots of photos. The light changes fast, and every angle gives a new story.
7. Try a Time-Lapse (Optional)
Want something extra? Time-lapse videos show the entire sky changing in just a few seconds.
- Set up your tripod to keep the camera steady.
- Interval shooting: Take a photo every 2–5 seconds for 20–30 minutes.
- GoPro users: Use Time Lapse or Scheduled Capture. It does the work for you.
- Avoid flicker: Don’t change settings while shooting; the video will look jumpy.
Bonus: From all those photos, pick one favorite frame; it might be your best shot.
8. Stay Longer (or Arrive Earlier)
The magic isn’t always at the exact sunrise or sunset moment.
- Sunrise: Some of the best colors appear 10–15 minutes after the sun rises.
- Sunset: Wait for the “blue hour”, 30–40 minutes after the sun goes down. When the sky deepens in color, the city lights add a calm and glowing touch.
Traveler’s tip: Most tourists leave too early. If it’s safe, stay longer; you’ll often capture something special after everyone else is gone.
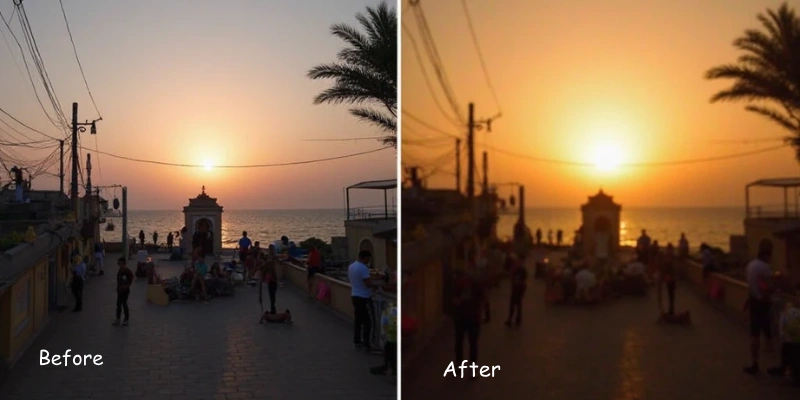
9. Edit Lightly
Editing is like seasoning food; just enough makes it delicious, too much ruins it.
- Crop: Remove distractions like wires or random people.
- Warmth: Add a little warmth to bring out golden tones.
- Balance light and dark: Brighten shadows or tone down overexposed areas.
- Keep it real: Over-editing makes sunsets look fake.
Apps like Lightroom, Snapseed, or even your phone’s editor are more than enough.
10. Keep Practicing
Sunrise and sunset photography takes patience. Don’t expect your first shots to look like professional ones.
- Light changes every single day, even in the same place.
- The more you practice, the better you’ll understand your camera and the sky.
- Try new places, experiment with angles, and don’t be afraid of mistakes.
- Most importantly, enjoy the view. The memory of watching the sky is worth more than the photo.
Traveler’s tip: Don’t shoot only for social media. Capture moments that make you happy, even if no one else sees them.
| Extra Tips for Travelers |
|---|
|
Final Thoughts
At the end of the day, sunrise and sunset photography isn’t just about chasing the “perfect shot.” It’s about slowing down, being present, and letting nature surprise you. Some mornings you’ll wake up early only to find heavy clouds. Some evenings, the sky might stay plain and gray. And then, every once in a while, the sky explodes with colors so magical you almost forget to take a picture.
The truth is, the best photos are often the ones that hold a memory, a quiet morning on a mountain, salty air on a beach, laughter with a travel buddy, or simply that moment when you felt grateful to be exactly where you were.
So, please keep it simple. Don’t overpack, don’t stress about perfect settings, and don’t forget to enjoy the view with your own eyes. Whether you’re using a phone, a GoPro, or a DSLR, the goal isn’t just a picture; it’s a story, a memory, and a little piece of magic you get to take home.
Next time you travel, give yourself those extra minutes to watch the sky change. Trust me, you’ll never regret it.
FAQs
Get there early! About 45–60 minutes before sunrise or 15–20 minutes before sunset is perfect. The best colors often show up right before the sun comes up or just after it goes down.
Not at all! A phone, a GoPro, or a simple DSLR is enough. The magic comes from good timing, angles, and light, not pricey gear.
Keep it simple:
- White balance: Cloudy
- ISO: 100–200
- Aperture: f/8 to f/11
- Shutter speed: Adjust until the brightness looks right.
On GoPro, just tap the sun on your screen to lock the exposure.
Add something extra! You can frame your photo with palm trees, moving waves, or human figures in the foreground. Use reflections in wet sand or water. Shooting at a slight angle (30–45°) to the sun also gives softer, prettier light.
It’s usually because of low light and shaky hands. Use a tripod or even a mini stand, and set a timer/remote so you’re not touching the camera when it clicks.
Yes! Put your camera on a tripod, set it to take a photo every 2–5 seconds for about 30 minutes, then turn the photos into a video. GoPro makes it even easier with built-in Time Lapse mode.
Keep edits light, crop out distractions, warm up the colors a little, and fix brightness if needed. Don’t go overboard; natural always looks better.

- Be Respectful
- Stay Relevant
- Stay Positive
- True Feedback
- Encourage Discussion
- Avoid Spamming
- No Fake News
- Don't Copy-Paste
- No Personal Attacks
- Be Respectful
- Stay Relevant
- Stay Positive
- True Feedback
- Encourage Discussion
- Avoid Spamming
- No Fake News
- Don't Copy-Paste
- No Personal Attacks
